|

|
IMAGE ANALYSE
|
|
MANUAL
|
IA Introduction
Welcome
to use IA Image analysis software. It is professional software, specialized
in capture, measure and analyzes images, which provide you a
multiple-function working environment.
Working Area
Please
put the USB KEY into the computer
USB port, and double click the icon ,
then you will see this software mainframe. If you do not put the USB KEY into the compute USB port,
some function is unable to use, but some basic function is still able to. ,
then you will see this software mainframe. If you do not put the USB KEY into the compute USB port,
some function is unable to use, but some basic function is still able to.
Button functions:
 Connect camera. Connect camera.
 Open
an Image file. Open
an Image file.
 Save Image file. Save Image file.
 Save the screen (save all of screen,
include image and measure result). Save the screen (save all of screen,
include image and measure result).
 Cancel. Cancel.
 Scale Setting. Scale Setting.
1) Click MOUSE.
2) To measure two points distance in an image, (SHIFT + Left Button)
click to set two points. The measure result is pixels. When the scale of the
view is 100%, the measure result is best.
3) The default distance is 1um, you can modify Distance, the Scale
will be auto calculate.
4) The scale result will be set in the Scale edit, and then you can name it and click the Add to add this scale in the scale
list.
5) You can directly select the scale from the scale list.
6) You can delete the scale result from the scale list the click Del.
7) Click OK, then the
measure result is calculated by you selected scale.
8) Click Cancel, the
measure scale will not change.

 Set the color of measure. Set the color of measure.
 Switch of show shape or not. Switch of show shape or not.
 Switch of show image or not. Switch of show image or not.
 Scope select, after set the area, you
can use Cut to cut the image. Scope select, after set the area, you
can use Cut to cut the image.
 Cut, after set the area with scope
select, you can cut the image. Cut, after set the area with scope
select, you can cut the image.
 Zoom in. Zoom in.
 The current view scale. The current view scale.
 Zoom out. Zoom out.
 Auto room. Auto room.
 Print. Print.
 About. About.
 These toolbars are check toolbar,
modify toolbar and measure toolbar. The detail will be introduced in the
following. These toolbars are check toolbar,
modify toolbar and measure toolbar. The detail will be introduced in the
following.
 Status bar shows the image size, mouse
position and the pixel of R G B. Status bar shows the image size, mouse
position and the pixel of R G B.
Load Image
l
Only support 8BPP, 24BPP and
32BPP image.
l
Binary image is 8BPP, and
only have two values, the type image is for particle analysis and morpha.
Image capture
If
you have a camera, click,
then you will have the camera dialog.
A:
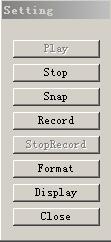
 Preview the image. Preview the image.
 Stop preview. Stop preview.
 Capture an image. Capture an image.
 Record the video. Record the video.
 Stop record. Stop record.
 … …
 … …
 Close the dialog.
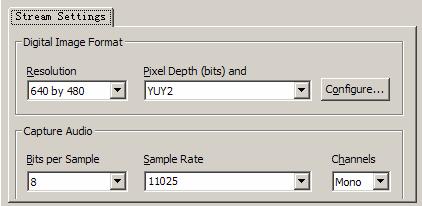
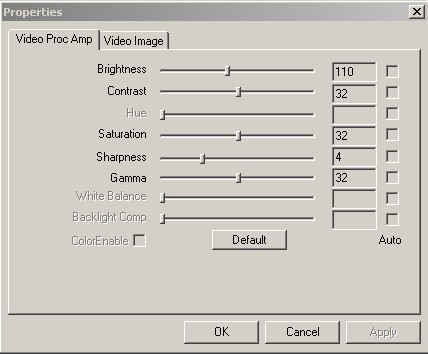
B: (For example: 2.0M pixel)
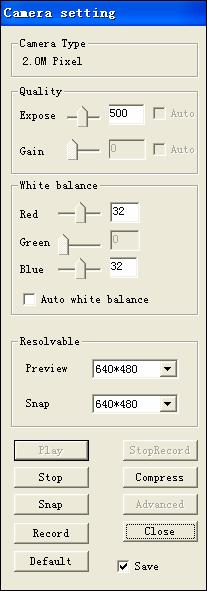
You can adjust the expose, gain,
and AWB. Some functions cannot be applied by all kinds of camera.
 Preview the image. Preview the image.
 Set the resolution of preview. Set the resolution of preview.
 Set the resolution of the capture
image. Set the resolution of the capture
image.
 Stop the preview. Stop the preview.
 Capture an image. Capture an image.
 Set the compress format. Set the compress format.
 Record the video. Record the video.
 Stop record. Stop record.
Close this dialog.
Load image
Click,
open the image.
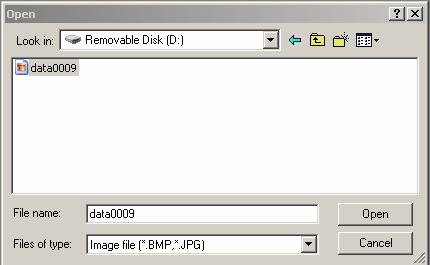
Support
*.bmp, *.jpg format image.
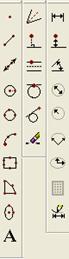
Measure tool
1)
 Point. Left button
click to set a point. Point. Left button
click to set a point.
2)
 Line segment. Left button
click twice to set a line segment, right button click to cancel. Line segment. Left button
click twice to set a line segment, right button click to cancel.
3)
 Line .Left button click twice
to set a line, right button click to cancel. Line .Left button click twice
to set a line, right button click to cancel.
4)
 Circle. Left button click
twice to set a circle, right button click to cancel. Circle. Left button click
twice to set a circle, right button click to cancel.
5)
 Circle. Left button click
three times to set a circle, right click to cancel. Circle. Left button click
three times to set a circle, right click to cancel.
6)
 Arc. Left button click three
times to set a arc, right click to cancel. Arc. Left button click three
times to set a arc, right click to cancel.
7)
 Rectangle. Left button click
5 times to set a rectangle, the first and second click the set the first
side, after click to set other side. Rectangle. Left button click
5 times to set a rectangle, the first and second click the set the first
side, after click to set other side.
8)
 Multi-shape. Left button
click several times to set a multiphase. Right click to cancel. Multi-shape. Left button
click several times to set a multiphase. Right click to cancel.
9)
 Ellipse. Left button click three times to set a ellipse, right
button to cancel. Ellipse. Left button click three times to set a ellipse, right
button to cancel.
10)
 Text. Left button set the text area, right button to cancel. Text. Left button set the text area, right button to cancel.
Modify tool
1)  Centerline. Left button selects the first side and second side,
the third click to set centerline. Right click to cancel. Centerline. Left button selects the first side and second side,
the third click to set centerline. Right click to cancel.
2)  Vertical line. Left button select the side and second click to
set the vertical line, right click to cancel. Vertical line. Left button select the side and second click to
set the vertical line, right click to cancel.
3)  Horizontal line. Left button select the side and second click to
set the horizontal line. Right click to cancel. Horizontal line. Left button select the side and second click to
set the horizontal line. Right click to cancel.
4)  Tangent line. Left button select the circle and second click to
set the tangent line on the circle, right click to cancel. Tangent line. Left button select the circle and second click to
set the tangent line on the circle, right click to cancel.
5)  Tangent line. Left button first click to set the point (left
button +SHIFT directly set the point), second click to select the circle, and
the third click to set the tangent line. Tangent line. Left button first click to set the point (left
button +SHIFT directly set the point), second click to select the circle, and
the third click to set the tangent line.
6)  Erase. Left button click to select the shape you want to erase. Erase. Left button click to select the shape you want to erase.
Measure tool
1)  Distance of two points. Left button first and second click to
select the point (left button + SHIFT directly set the point), the third
click to set the measure result place. Right click to cancel. Distance of two points. Left button first and second click to
select the point (left button + SHIFT directly set the point), the third
click to set the measure result place. Right click to cancel.
2)  Distance of vertical. Left button first click to select the point (left button + SHIFT
directly set the point), second click to select the line, the third click to
set the measure result place. Right click to cancel. Distance of vertical. Left button first click to select the point (left button + SHIFT
directly set the point), second click to select the line, the third click to
set the measure result place. Right click to cancel.
3)  Angle of two lines.
Left button first and second click to select the two lines, the third click
to set the measure result place, right click to cancel. Angle of two lines.
Left button first and second click to select the two lines, the third click
to set the measure result place, right click to cancel.
4)  Diameter. Left button first click to select the circle or arc, second click
to set the measure result place, right click to cancel. Diameter. Left button first click to select the circle or arc, second click
to set the measure result place, right click to cancel.
5)  Radius. Left button first click to select the circle or arc,
second click to set the measure result place. Right click to cancel. Radius. Left button first click to select the circle or arc,
second click to set the measure result place. Right click to cancel.
6)  Angle of arc. Left button first click to select a arc, second
click to set the measure result place. Right click to cancel. Angle of arc. Left button first click to select a arc, second
click to set the measure result place. Right click to cancel.
7)  Ellipse shaft length. Left button first click to select a
ellipse, second click to measure the long shaft of short shaft. Right click
is cancel. Ellipse shaft length. Left button first click to select a
ellipse, second click to measure the long shaft of short shaft. Right click
is cancel.
8)  Area measure. Left button first click to select a closed shape,
second to set the measure result place, right click to cancel. Area measure. Left button first click to select a closed shape,
second to set the measure result place, right click to cancel.
9)  Edit measure result. Left button first click to select the
measure result, and then edit the measure result. Edit measure result. Left button first click to select the
measure result, and then edit the measure result.
Image mode
Introduce
the menu of “Image Mode”
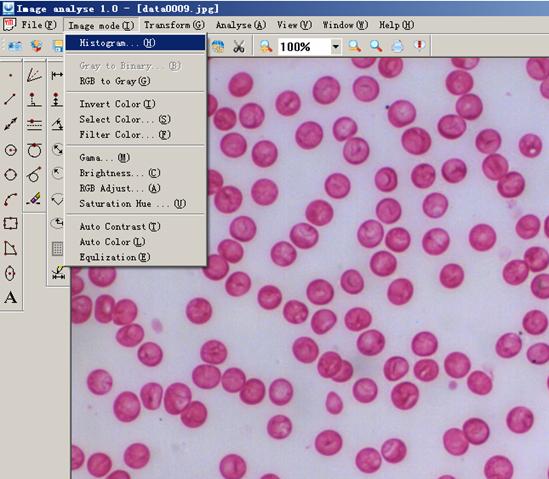
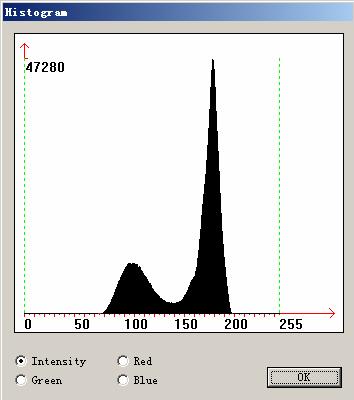
Histogram Gray image is intensity histogram, Color image is intensity and
RGB channel histogram.
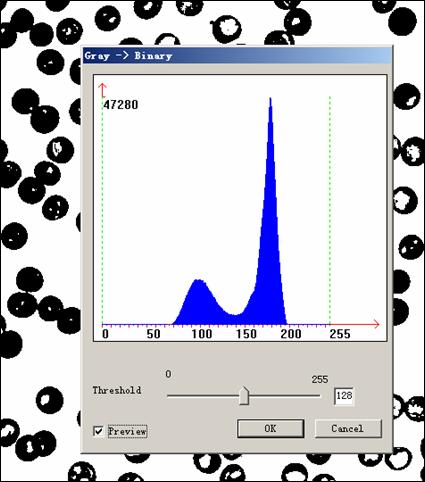
Binary Gary image change to white-black image, in this image only have two
values: 0,255. This type image is for particle analyses and morph.
Color to gray. Change the color image to gray image.
Invert. Color invert.
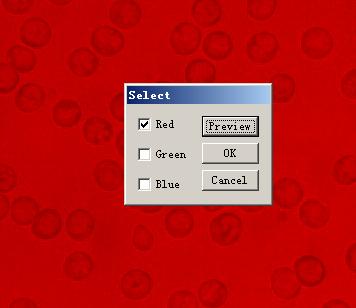
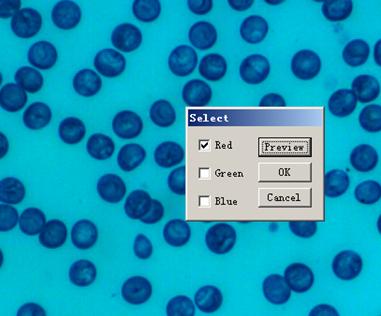
Select color. The Image only
has you selected channel color.
Filter color. The image will
have not the channel color you selected.
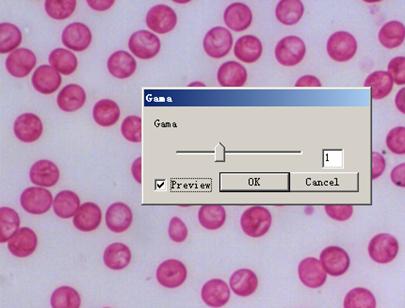
Gama: Adjust image by Gama.
Brightness and contrast: adjust
image by brightness and contrast.

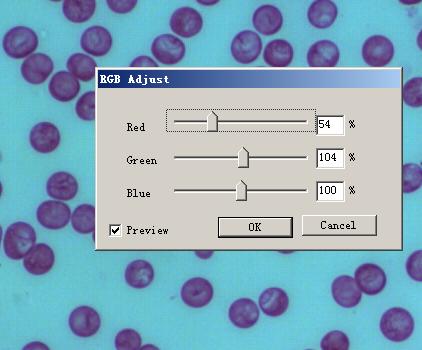
RGB adjust: Adjust image
by RGB.
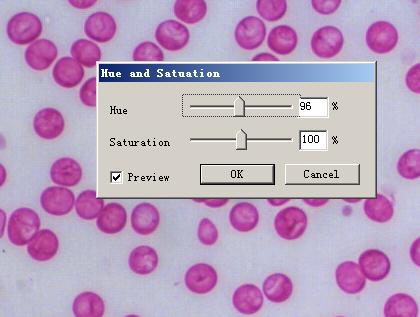
Saturation and hue: adjust image
by saturation and hue.
Auto contrast: adjust image
by auto contrast.
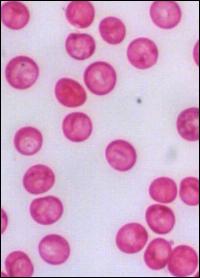 
(Before)
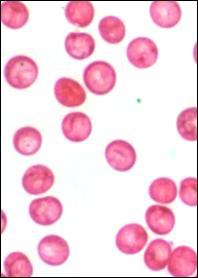
(After)
Auto color: adjust image by
auto color.
(Before)
(After)
Equalization: adjust image by equalization.
Transform
Introduce
the menu “transform”.
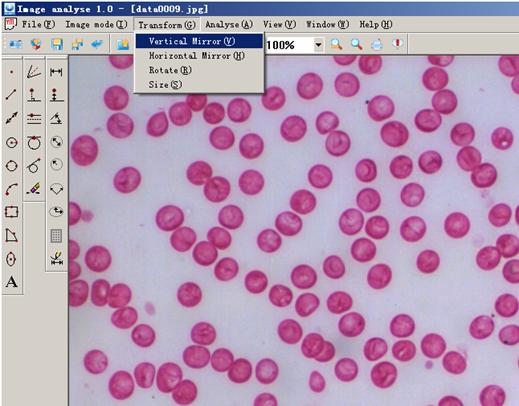
Vertical mirror: Mirror the
image in vertical.
Horizontal mirror: Mirror the
image in horizontal.
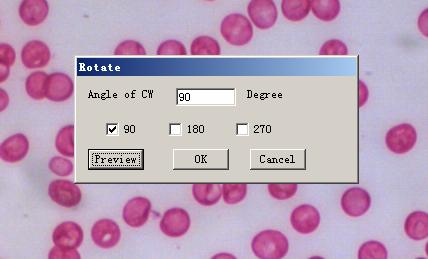
Rotate: rotate the image.
Size: adjust the image size.
Image analyses
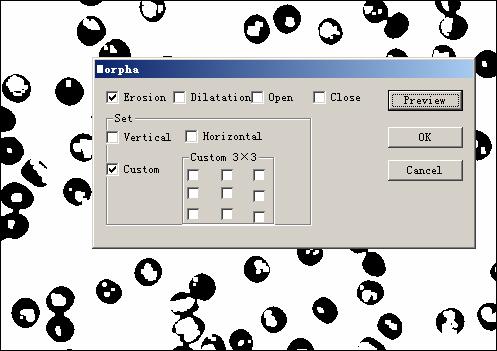
Morph: erosion, dilatation, open, close, custom (only support white-black image).
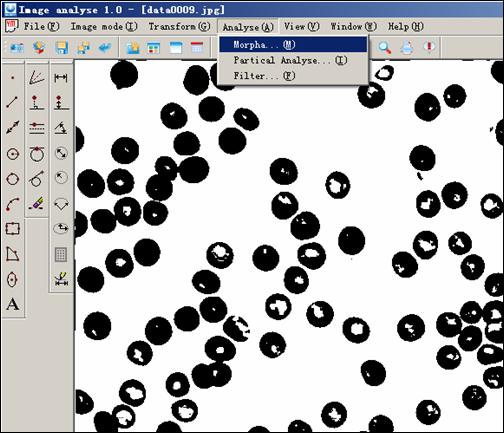
Particle analyses: particle analyses are only support white-black image. The length
is the edge length, for example, a cirque’s length is the sum of the out
girth and in girth. White and Black are to select which color you
want to calculate. Min area is the
threshold of area, a area if less than the threshold will not calculate. Statistic percent is calculating
area percent in the total area. Save
is to save the result to a *.csv file, which can open by excel.

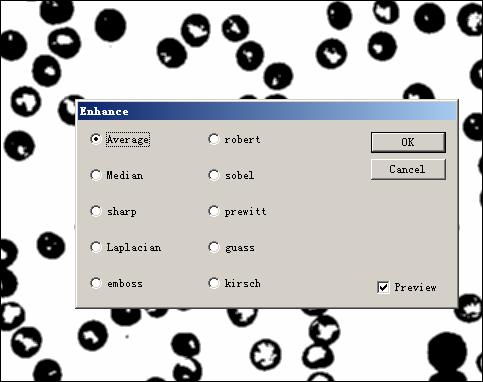
Filter: enhance the image by filter.
Measure satiates
Measure satiates is the
shape’s basic info.
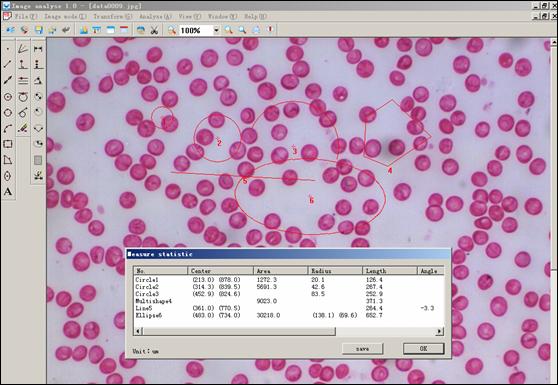
Save: output the measure result to
*.csv file, which can open by Excel.
(Thank you for reading!)
|